---
title: Inclinometer Template Set up Feature
description: You can now set key parameters before generating your inclinometer template. This allows you to tailor the template to your specific needs, reducing post-setup adjustments and streamlining your workflow.
---
[Skip to content](https://help.proqio.com/inclinometer-template-set-up-feature#main-content)
[](https://help.proqio.com/?hsLang=en)
Open main navigation
Close main navigation
How can we help you?
- There are no suggestions because the search field is empty.
1. [Knowledge base](https://help.proqio.com/?hsLang=en)
2. [New Feature Releases](https://help.proqio.com/new-feature-releases?hsLang=en)
# Inclinometer Template Set up Feature
## This feature is designed to simplify the process of setting up and integrating Inclinometers into Proqio. It enables the user to easily set and customise the key parameters of the Inclinometers.
### Why is this functionality useful?
By setting key parameters in advance, the process of inclinometer configuration in Proqio is streamlined, simplified and less time-consuming. This makes the workflow clearer and better tailored to the specific inclinometers being monitored.
---
### Feature Highlights
- **Pre-Configuration** – Define inclinometer parameters before generating the template.
- **Consistency** – Ensures templates are adapted to the specific inclinometer characteristics.
- **Efficiency** – Saves time by moving directly into monitoring without repeated corrections.
---
### How does the Inclinometer Template Set Up feature work?
When you begin creating a new **Inclinometer Template**, Proqio will initiate a pre-configuration step to ensure the correct setup.
### 1. Inclinometer Type Selection
- Users must select the orientation of the inclinometer:
- **Horizontal**
- **Vertical**
### 2. Parameter Configuration
After choosing the inclinometer orientation, the user can configure the sensor´s key parameters:
- **Max Chain Length** – Set the maximum length of the inclinometer chain. Valid values range from **1 to 100**.
- **Units** – Choose the preffered output units:
- **mm (millimeters)**
- **inches**
---
### **How do I access and use this feature?**
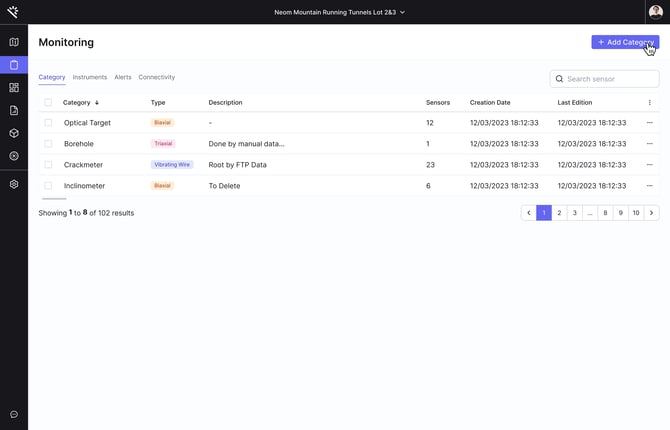
**1.** Navigate to the **Category** tab on the **Monitoring** section
****
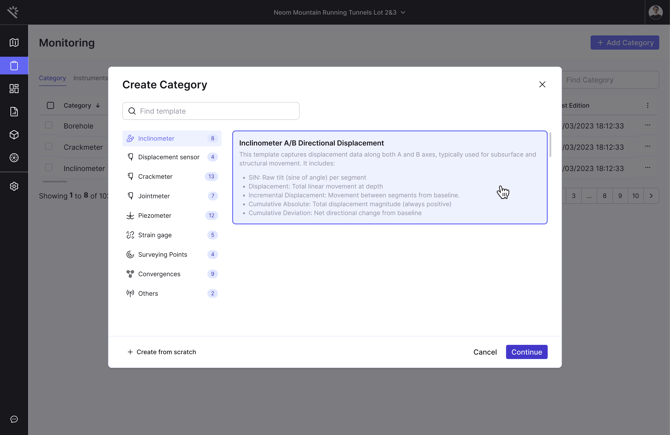
**2.** Start creating a new category and choose the **Inclinometer Template**
****
**3.** Follow the guided pre-configuration steps to select the inclinometer type, max chain length, and output units.

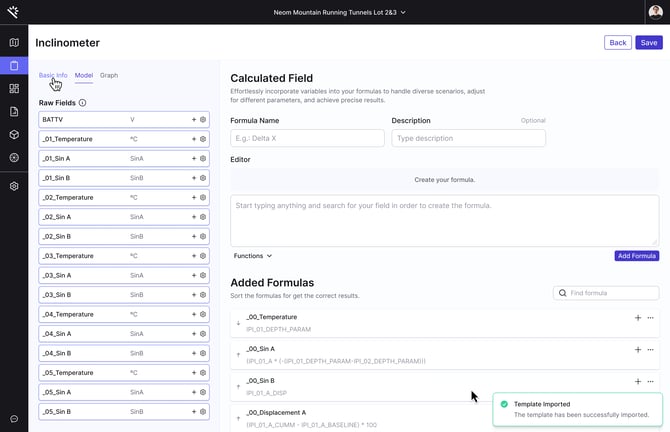
**4.** Proceed to generate your template, and which will be configured according to your selection.
- [Getting started](https://help.proqio.com/getting-started?hsLang=en#main-content)
- [Project details](https://help.proqio.com/getting-started?hsLang=en#project-details)
- [Teams and members](https://help.proqio.com/getting-started?hsLang=en#teams-and-members)
- [Account](https://help.proqio.com/getting-started?hsLang=en#account)
- [Configure Your Instruments](https://help.proqio.com/getting-started?hsLang=en#configure-your-instruments)
- [Notifications](https://help.proqio.com/getting-started?hsLang=en#notifications)
- [Connectivity methods](https://help.proqio.com/getting-started?hsLang=en#connectivity-methods)
- [Alerts](https://help.proqio.com/getting-started?hsLang=en#alerts)
- [Map](https://help.proqio.com/map?hsLang=en#main-content)
- [Tools](https://help.proqio.com/map?hsLang=en#tools)
- [Analysis](https://help.proqio.com/map?hsLang=en#analysis)
- [Monitoring](https://help.proqio.com/monitoring?hsLang=en#main-content)
- [Instruments](https://help.proqio.com/monitoring?hsLang=en#instruments)
- [Dashboard Creation & Configuration](https://help.proqio.com/dashboard-creation-configuration?hsLang=en)
- [Report Creation](https://help.proqio.com/report-creation?hsLang=en)
- [New Feature Releases](https://help.proqio.com/new-feature-releases?hsLang=en)
- [Project Hierarchy](https://help.proqio.com/project-hierarchy?hsLang=en)
- [Analyse and Interpret your Data](https://help.proqio.com/analyse-and-interpret-your-data?hsLang=en)
- [Learn How to Navigate Proqio](https://help.proqio.com/learn-how-to-navigate-proqio?hsLang=en)
- [Configure Your Map View](https://help.proqio.com/configure-your-map-view?hsLang=en)
- [How to Add a Real Time Picture on Map](https://help.proqio.com/how-to-add-a-real-time-picture-on-map?hsLang=en)
- [Managing Your Data](https://help.proqio.com/managing-your-data?hsLang=en)
- [Uploading Records Manually](https://help.proqio.com/uploading-records-manually?hsLang=en#main-content)
- [Steps for uploading instrument data records manually](https://help.proqio.com/uploading-records-manually?hsLang=en#steps-for-uploading-instrument-data-records-manually)
- [ADA](https://help.proqio.com/ada?hsLang=en)
- [Digital Twin](https://help.proqio.com/digital-twin?hsLang=en)
- [Lines and Textures](https://help.proqio.com/lines-and-textures?hsLang=en)
[](http://www.proqio.com?hsLang=en)
Copyright © 2026, Proqio